

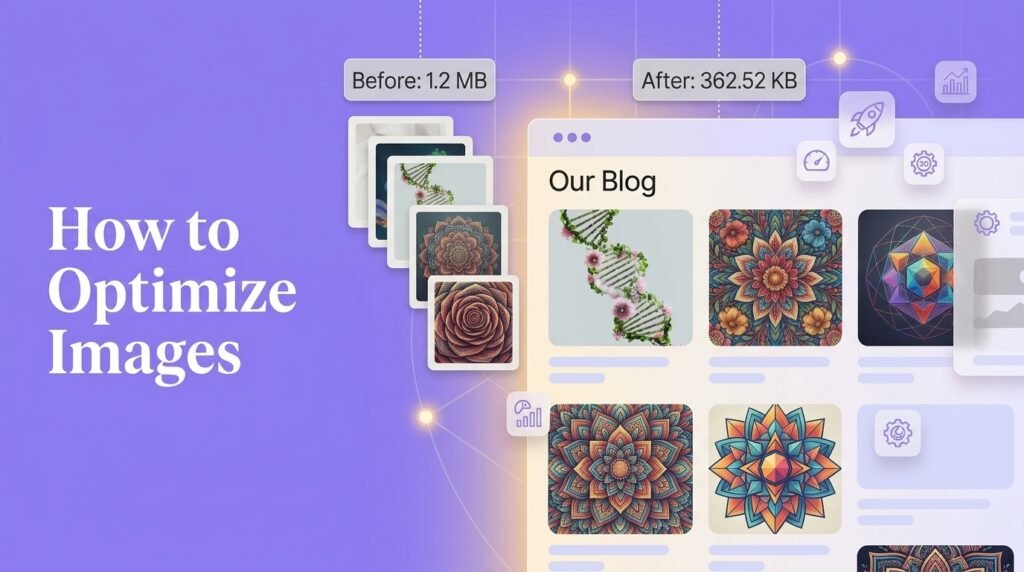
To optimize images for WordPress, resize them to their real display width before uploading, convert them to WebP, add width and height attributes, and lazy-load everything except your hero image. Then name files descriptively and write accurate alt text, which is what makes them findable.
Image optimization has two separate jobs. One makes your pages load faster, the other makes your images findable by Google and by AI assistants. Most guides cover one and ignore the other, and most people do the easy half. This covers both, in the order that actually works, and starts with the reason so many sites compress their images and see no improvement at all.
Why Optimize images are usually the fastest win available
Images typically account for 40% to 60% of a page’s total weight, which makes them the heaviest thing most sites can fix without touching code. Analysis across a large set of WordPress sites found that properly sized and compressed images regularly moved LCP scores from over four seconds to under two and a half, and that adding width and height attributes eliminated most layout shift problems on its own.
They touch all three Core Web Vitals. A heavy hero image drives up LCP. Missing dimensions cause CLS as the page jumps while images load. And oversized files consume main-thread time that hurts INP on slower phones.
One caveat on order, because it saves wasted effort: if your server response time is over roughly 600 milliseconds, fix that first. Optimize images on a slow server is painting the walls of a house with a leaking roof. Check your server response in PageSpeed Insights before starting, and if it is the bottleneck, that is a hosting problem rather than an image problem.
I compressed my images and nothing changed
This is the most common complaint, and there are three usual explanations. Worth reading before you install another plugin.
Your plugin compressed but did not resize
Compression reduces file size at the same dimensions. If you uploaded a 4000-pixel-wide photo into a slot that displays at 800 pixels, the browser still downloads a 4000-pixel image and shrinks it with CSS. It is smaller than it was and still far bigger than it needs to be. Resizing is a separate operation, and it matters more.
Your page builder is bypassing responsive images
WordPress generates several sizes of every upload and uses a srcset attribute so browsers pick the right one. Some page builders output one hardcoded full-size image instead, which throws that away. If you build in Elementor or a similar builder, check the rendered page source for srcset on your main images.
Your biggest image is a CSS background
Browsers cannot prioritise a background image the way they prioritise a real image tag, so a hero set as a section background loads later than it should. If your LCP is failing on a hero area, rebuilding it as an actual image element often fixes it outright. This is a frequent Elementor pattern in particular.
Step 1: Resize before you upload
This is the highest-value habit in the whole guide and it costs nothing.
Find the widest your image will ever display. For most themes, a full-width hero lands somewhere around 1600 to 1920 pixels, in-content images around 800 to 1200, and thumbnails far smaller. Resize to roughly double the display width if you want it to look sharp on high-density screens, then stop.
Uploading a 4000-pixel image so WordPress can generate smaller versions still leaves the original sitting in your media library, and some contexts will serve it. Resize first with any editor, or with a free browser tool like Squoosh which shows you the file size change as you adjust.
For sites where uploads come from several people, a plugin that automatically resizes on upload is worth having, because the habit is the part that breaks.
Step 2: Use WebP (and AVIF where it fits)
WebP is the right default in 2026. It produces files roughly 25% to 35% smaller than JPEG at comparable quality, and WordPress has supported it natively since version 5.8.
AVIF compresses better still, with reported additional savings in the 25% to 50% range over WebP, at the cost of slower encoding. Treat it as an upgrade rather than a starting point, and only if your delivery tool provides a fallback for older browsers.
On quality settings, the practical guidance is WebP at 75 to 85, and AVIF around 60 to 70 for roughly equivalent visual quality to JPEG at 85. Do not chase numbers; compare the result visually and stop when you can see the difference.
Most people should let a plugin handle conversion in bulk rather than doing it by hand. ShortPixel, Imagify, EWWW and Smush all convert existing libraries and handle new uploads automatically, and any competent caching plugin can serve the converted format with a fallback.
Step 3: Protect your LCP image
Lazy loading defers offscreen images until the visitor scrolls, and WordPress adds loading=”lazy” automatically since version 5.5. Leave that on. But never lazy-load your LCP image, because doing so delays the exact element Google measures.
Find your LCP element first: run your page through PageSpeed Insights and look at the LCP section of the diagnostics, which names it. On most pages it is the hero image or the featured image at the top of a post.
Then do two things with it. Exclude it from lazy loading (every caching and image plugin has an exclusion setting). And give it priority, either with fetchpriority=”high” or by preloading it, which tells the browser to fetch it before other resources. Several performance plugins do this automatically once you identify the image.
This one adjustment moves LCP more reliably than almost anything else on a typical business page.
Step 4: Always set width and height
Every image tag on your site should carry width and height attributes. This reserves the correct space before the file finishes downloading, which prevents the page jumping as images appear.
That jump is Cumulative Layout Shift, and it is the easiest of the three Core Web Vitals to fix. WordPress adds these attributes automatically for images inserted through the editor. It is custom code, hardcoded HTML and some page builder output where they go missing, which is worth checking on your templates.
Step 5: Let responsive images do their job
WordPress generates multiple sizes on upload and serves them through srcset, so a phone downloads a phone-sized file rather than a desktop one. This works by default and mostly needs protecting rather than configuring.
Two things to check. Confirm srcset is present in your rendered page source, since some builders and custom templates strip it. And check that your registered image sizes roughly match your real breakpoints, because generating a dozen sizes nobody uses just fills your server with files.
If you have changed themes or image sizes, existing uploads keep their old dimensions. Regenerating thumbnails after a theme change fixes the mismatch, and plugins exist for exactly that.
Step 6: Name your files properly (this matters more than it used to)
Now the SEO half, starting with the part almost everyone skips. Rename files before uploading. IMG_4821.jpg tells search engines nothing. leather-crossbody-bag-tan.jpg tells them exactly what the image shows.
Use lowercase, hyphens between words, and a short description of the actual subject. Keep it honest rather than stuffed; a filename is a label, not a keyword field.
The reason this matters more in 2026 is worth knowing. Filenames persist everywhere the image travels: the URL, every CDN reference, every srcset entry, your image sitemap, your Open Graph tags. Alt text can be stripped when an image is reused elsewhere; the filename cannot. Bing is reported to weight filenames more heavily than Google does, and since ChatGPT’s web search sits on the Bing index, a descriptive filename affects whether your images surface in AI search results as well as in Google Images.
If your media library is already full of camera filenames, do not rename existing files by hand, because that breaks every existing reference. Fix the habit going forward and use a plugin for bulk work if the library is large.
Step 7: Write alt text that describes the image
Alt text serves two audiences that want the same thing: screen reader users who need to understand the image, and search engines that use it as a primary signal for image search.
Write what the image actually shows, starting with the subject and adding context. Skip “image of” and “photo showing”. Around 80 to 125 characters is a sensible length. Include your keyword only where it belongs naturally.
Good: Red Kia Sportage parked in a snow-covered driveway at sunrise Bad: best car dealer affordable cars buy cars Colorado
Two rules that most sites get wrong:
Every image needs unique alt text. Copying the same description onto twenty images is a spam signal and useless to a screen reader.
Decorative images need empty alt text, not missing alt text. Icons, dividers and background flourishes should carry alt=””, which tells a screen reader to skip them. Leaving the attribute off entirely makes the reader announce the filename instead, which is worse than saying nothing.
For consistency, keep filename and alt text describing the same thing. When they contradict each other, the signal weakens.
Step 8: The technical SEO layer
Three checks that take a few minutes and are easy to forget.
Image sitemap
Confirm your SEO plugin includes images in your sitemap. Both Yoast and Rank Math do this by default, and it helps images get discovered.
Crawlability
Make sure your robots.txt does not block your uploads directory. It is an unusual mistake and a total one, since an uncrawlable image cannot rank anywhere. If you are working through indexing problems generally, this belongs on the same checklist.
Attachment pages
WordPress creates a separate page for every uploaded image, each one thin and near-empty. Most SEO plugins offer an option to redirect attachment URLs to the parent post. Turn it on, because hundreds of empty pages both clutter your index and waste crawl attention.
For product images specifically, structured data matters more, since product markup with multiple images feeds rich results and helps AI systems understand what you sell. That sits alongside the wider store performance work rather than replacing it.
A workflow you can actually keep
The reason image optimization decays is that it depends on habits rather than a one-time fix. Three simple rules cover it.
Before upload: resize to display width, rename the file descriptively.
On upload: write alt text in the media library while you are already there. Doing it later means doing it never.
Ongoing: run a bulk conversion and compression pass after installing your plugin, then let it handle new uploads automatically. Re-check your LCP image after any design change, since a new hero resets that work.
If several people add content, write those three rules somewhere they will see them. This is exactly the kind of standard that quietly holds or quietly slips depending on whether anyone owns it, which is why it usually ends up inside a maintenance routine.
Common mistakes
- Compressing without resizing. The single biggest reason optimization appears to do nothing.
- Lazy-loading the hero image. Actively harms the metric you are trying to improve.
- Uploading straight from a phone or camera. Multi-megabyte files where a few hundred kilobytes would do.
- Keyword-stuffed alt text. A spam signal, and useless for accessibility.
- Missing width and height on custom or hardcoded images, causing avoidable layout shift.
- Stacking two image plugins. They fight, and you cannot tell which one produced a result.
- Optimizing images while ignoring server response time. Fix the foundation first.
Conclusion
Image optimization has two jobs, and doing only the first leaves value on the table. For speed: resize before uploading rather than relying on compression alone, convert to WebP, set width and height on everything, lazy-load below the fold but never your LCP image, and give that hero image explicit priority.
For findability: rename files descriptively before upload, write unique alt text that describes what the image shows, use empty alt on decorative images, and make sure your images are crawlable and in your sitemap. Filenames carry more weight than most people assume, particularly for Bing and the AI assistants built on it. And if your server response time is slow, fix that before any of this, because no amount of image work rescues a slow server.
Frequently Asked Questions
What is the best image format for WordPress in 2026?
WebP is the right default, producing files roughly 25% to 35% smaller than JPEG at similar quality, with native WordPress support since version 5.8. AVIF compresses further and is worth using where your delivery tool provides a fallback for older browsers. Keep JPEG or PNG only as fallbacks.
What size should images be for WordPress?
Match the widest size the image will actually display, then roughly double it for high-density screens. Full-width heroes usually need around 1600 to 1920 pixels, in-content images 800 to 1200. Uploading camera-resolution files wastes bandwidth even after compression, because compression does not change dimensions.
Why is my site still slow after compressing images?
Usually because the plugin compressed without resizing, so the file is still far larger than its display slot. It can also be a page builder outputting one hardcoded full-size image instead of responsive srcset, or a hero set as a CSS background, which browsers cannot prioritise like a real image tag.
Should I lazy-load all images in WordPress?
No. Lazy-load everything below the fold, which WordPress does automatically since version 5.5, but never lazy-load your LCP image. Delaying the hero image directly harms the metric Google measures. Exclude it from lazy loading and give it priority with fetchpriority or a preload instead.
Does alt text help SEO?
Yes. Alt text is a primary signal for image search and helps search engines understand page context, and it is an accessibility requirement independently of that. Write a unique, accurate description of what each image shows, and use empty alt text on purely decorative images rather than leaving the attribute out.
Do image filenames matter for SEO?
Yes, and more than many people assume. Filenames persist in the URL, CDN references, sitemaps and social tags, where alt text can be stripped. Bing is reported to weight filenames heavily, and since ChatGPT’s search uses the Bing index, descriptive filenames affect visibility in AI search as well as Google Images.
